

Fulldome 3D for Everyone - Part 2 / 5
Tilted domes
The shader has a dome tilt parameter and a switch to enable automatic compensations. What happens when compensation is turned on, is that all the calculations are shifted and assume that the head of the viewer sits vertically, while the dome tilts.
This compensation is pretty effective, but remember that the tilt value might not be the actual tilt of the dome, but a combination between the dome, the reclined seat, and the headrest.
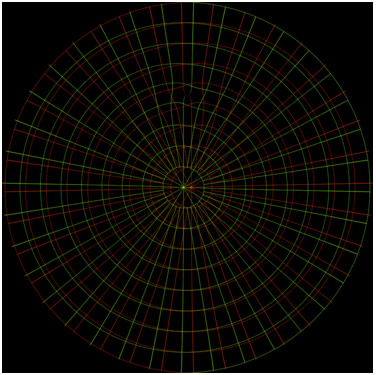
An example of a reference grid rendering with a tilt of 45 degrees. Note that the pinch has now moved toward the back of the domemaster image. Control maps need to be adjusted for the proper dome tilt correction.
Vertical mode
There is also a vertical mode switch. When that is selected, some parameters are ignored, and instead all the formulas change to automatically adjust for vertical domes, where the head stays vertical and the pinch areas at the top and bottom need a different type of correction.
Vertical mode simplifies everything. No control maps are really necessary, but they can still be used for example to control the left and right edge different image crop. Make this image small enough so that the centers separation is less than the distance between your eyes, and look far away. If you can focus, you will see a perfectly 3D room.
The cameras
The shader can generate images for one camera at a time. Your animation will have to be rendered twice, first for one eye, than for the other.
There is an option to use the Center camera. That means that no virtual point of views are created and the shader behaves like a traditional Angular Fisheye.

All the parameters of the lens shader as seen in 3ds Max.
The Center camera code adds a few optimizations to the original angular fisheye code to make it a bit faster and more efficient.
The tests
To test the shader I created a lot of still images and a few animations. I was able to test them simulating the domes on a dome simulator created in 3ds Max. The simulator was generating relaxed-eyed image pairs of what the viewer would see when looking at a specific area of the dome.
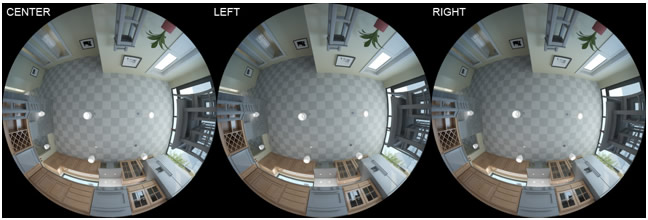
Above, are the Center, Left and Right domemaster images generated by the lens shader. As you can see, the top pinch has been corrected.
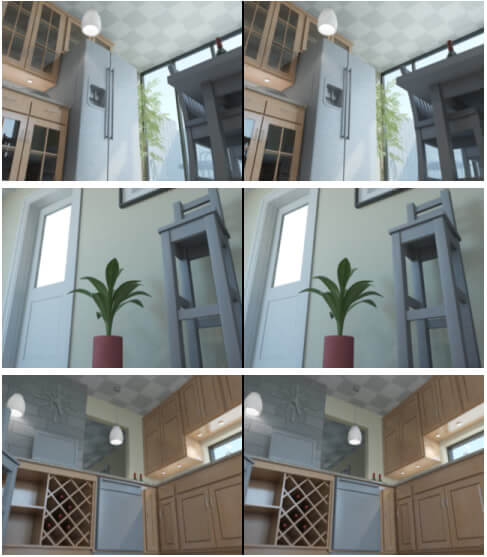
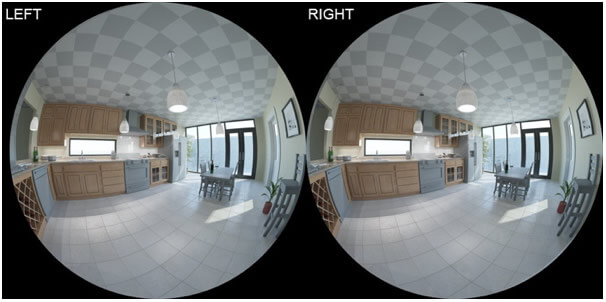
Above, are sample stereo pairs created by the dome simulator using the Left and Right domemaster images above. Relax your eyes and you will see them in 3D.
This simple simulator was able to verify that the technique and the math I developed were generating correct images also for tilted and vertical domes.
Real testing with animation was performed in a couple of opportunities. First on a 10 meters inflatable dome at Treasure Island, in the San Francisco bay. A big thank you to Timothy Childs for the opportunity and to let me see for the first time the result of weeks of work.
Later on, thanks to Aaron, I managed to get some time at the San Francisco Academy of Science planetarium. There I could check four test animations and verify that the dome tilt correction was working wonderfully. Another big thank you to Cheryl Vanderbilt, Kira Hammond, Michael Garza, Ryan Wyatt, Tim Horn, Tom Kennedy.
At that time Aaron Bradbury was already experimenting with the shader too. And since we used anaglyph glasses, he warned me that the red channel was quite dark.
In fact, two of my tests didn’t work well as the eye looking through the red filter could not see much.
But the two brighter tests were spectacular, with the 3D effect perfectly visible all over the dome, and with a surprisingly ability of the eyes to adapt when looking at the screen even with the head slightly tilted from the assumed position.
Open Source The project is now open source and available on GitHub.
« Go to Part 1 |
Go to Part 3 » |
Have you liked this post? Subscribe to FDDB Newsletter
Related news
Pavel Karas
News
IPS Fulldome Festival Brno 2016: Registration is open
The registration for the IPS Fulldome Festival Brno 2016 has been opened! Go to http://fulldomefestivalbrno.cz/reg-earlybird/ and get your ticket in time! The festival admission is EUR 60 (early bird full event registration until March 31). This price includes: entry to all projections for all festival days entry to the gala evening on Friday June 17 with the […]

Dan Neafus
News
IMERSA Day June 25th: Inclusive Immersive Media
How can we make immersive technologies more equitable? Virtual event Friday June 25, 2021 10:00 AM – 12:00 PM MDT $20 registration (free to IMERSA members)

Ryan Moore
News
Announcing the Dome Fest West $5,000 Pitch Competition!
Calling all immersive filmmakers and storytellers! We are thrilled to announce the Dome Fest West 2024 $5,000 Pitch Competition presented by Hubblo.
Sign up now, it's free!